

I have been admiring, for several years, Ali Edwards' December Daily projects; she scrapbooks a little something for the 1st through the 25th of December. Now, my own record with any kind of daily anything hasn't been good. I eagerly bought all kinds of *stuff,* thinking that would be the motivation to get me to follow Ali's "Week in the Life" project. I picked a week in April of 2009 and my friends, that project (seven simple days' worth o' pages) is limping toward the finish line. Again, this whole December thing really had me wanting to buy the gorgeous products that Ali and her followers make just. so. appealing. But I decided to take a deep breath, comb through everything I already owned, and ultimately go with a format that I use all the time and that wouldn't cost a dime (more about that at the end -- the format and binding).
So I was embarrassed -- absolutely mortified -- at the amount of *stuff* I already had on hand for this project. Glad to the core of my being that I didn't go ahead and buy anything for this. Ali says that the key to success is to have foundation pages made before the month begins, so here is the rundown of my pages. That first photo, above, is the page one that you'll see when you open the cover (covers have yet to be made). There will be no plastic pages; each page or element will simply get bound at the end. The *Christmas* box is cut from a catalog; I love to use ephemera from catalogs, magazines, etc.
 I hope no one will want to know details on the products I used, because mostly this stuff is so old that it's long been separated from its packaging. Below is the spread for Day One, with the number stamped onto a gift tag:
 Day Two features one of this year's Christmas cards (always like to order those early), and a photo element that is based on an idea of Ali's....
 Throughout the journal, I'll use several of these "Christmas past" elements as a way to incorporate old photos, family, etc. The other challenge (aside from actually DOING it) that I foresee for this project is that with Dean being 13, and Ken and I working, there won't be a holiday event to record every day. Therefore I want to be able to make this a memory book to highlight things about past Christmases, as well as the family we don't have with us any longer. Not thinking about that in a melancholy way, more like wanting to celebrate those days gone by. I only have a few of these "Christmas past" elements in on these foundation pages, but I'll make more as it seems appropriate along the way.
 I tried to keep an eye on the day of the week for each date, and this spread is the first weekend in December during which I hope to do some baking. I can tell you that the cookie letters came from Lettering Delights.
 Sorry the photos are kind of dark and off for color -- I tried! The sixth is St. Nicholas Day, which I noted on the "6" tag (an old one from Elle's Studio, with these being the current ones), and then
 I stapled on this ribbon piece. Some of the pages were plain white on the back, so I adhered them to the next page (adhered two pages together, back-to-back) which allowed me to do things like use staples and having the back sides hidden between pages that were attached to each other. Know what I mean?
 This is one of my favorite spreads. Here, next to the Day Seven page, I have a small, third-of-a-page size sheet sitting in front of the full page for Day Eight. (Find the free page of number labels, from which I cut the "7" tag, here.) I have a few of these "floating," short elements in here now and may add more as I go. So, you flip over the short sheet and you see
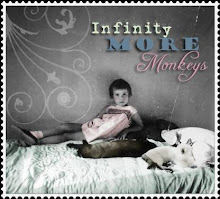
 this -- the flip side of the short sheet, which has a little print out of an album cover from one we had at our house growing up, and another "Christmas past" element:
 My mom, as a teenager, with her beloved dog, Penny. It's a sheet of vellum with a white swirl pattern on it, and the white strip down the side was punched with a Martha Stewart craft punch with the little branch design (look back at the previous photo to see what I mean).
The spread for Day 9:
 This falls on a Friday, and I plan to either do some of the last shopping or the wrapping that day -- hoping that part of the good fallout from this project will be some pre-organization not just of these pages but also of my own activities!
 This little slip of a page from a children's book came from a mixed package of ephemera that I got from a vendor on Etsy. This little flashcard also came from an Etsy seller and the large 9 flashcard came from an old set from 7Gypsies that doesn't seem to be around anymore (but it would be easy to come up with your own -- or from one of the many Etsy sellers who seem to be doing things with flash cards these days!)
 The spread for Day Ten, similarly, has a small piece of old sheet music sitting there, and a piece of vellum before you get to Day Eleven:
 My husband's dad wasn't much of a photographer, and his mom is loathe to pass along any family photos or anything to us, so I don't have much from my husband's childhood other than these *reject* kinds of shots with the top of his head, etc. (It's tough to go up against my family's photos, given that both my parents were professionals and I have a huge, huge collection.)
I don't love the way the adorable element unto itself -- a bookshelf full of vintage holiday books with the number 12 -- ends up looking on this spread. I often do things separately and piecemeal -- I didn't know when I made the 12 element what the page would end up looking like -- but I like to play and experiment more than I like to plan and obsess. The candy cane is a photo cut from a catalog.

Here's the spread for days Thirteen and Fourteen. I'm struggling with wanting to put LOTS on these pages now, but I'm holding myself back so that I have room to put in photos and journaling as we go along. The letterpress tag, from Paper Source, says "Happy Holidays!" (I bought my set several years ago so the current selection is different, but letterpress stuff is just so wonderful in general.)
 The vellum that I used for Day Sixteen is a bit bumpy at the top and bottom because of the way I adhered it to the next page, which is textured. I'll probably end up covering most of that up once I fill in the page. I like the lack of consistency with this project; the idea of having one format for every day didn't appeal to me as much so I'm comfortable with the differing styles in here. For me, everything comes together simply because it all makes sense to me. I don't like producing something that looks too much like what someone else might have done. (Good justification, again, for not spending the money on the kit, right? I do keep trying to convince myself....)
 The spread for Day Seventeen is also one of my favorites. That page on the left is heavily textured so at most I may add one photo or something. The polar bear punch is another Martha product; I attached three bears, then punched three more and attached those with 3-D mounts so that they'd pop off the page (but that you'd still see bear shapes underneath):
 I'm doing more full spreads through here because the 16th will be our last day of school before the break so I'm hoping Dean and I will be doing more holiday stuff to document!
Here's Day Eighteen, which features

A "Christmas past" element of my dad as a boy, being visited by Santa (he's in the back row, center, next to Santa -- the "memories" tab is kind of pointing to him):
 Days Nineteen and Twenty:
Twenty one and Twenty two, with the three wishes tickets that I adore:
 I made the element for 22 with several different punches and bits and pieces of paper:
 Spread for Day 23 has a sticker measuring ruler from Rebecca Sower. Can't say how disappointed I've been to find that quite a few makers of high-end stickers for scrapbooking produce them in such a way that if you don't use them shortly after purchase, they will adhere permanently to the plastic sheets they are on. I had to cut it out and adhere it which worked, but seems ridiculous. The twenty three is highlighted by another punched element that...
 ...I glued microbeads from a holiday glitter set by Martha:
Christmas Eve doesn't have a number yet, but I printed "'twas the night before Christmas" across the top of the page. I don't have a lot of photos of Dean with Santa -- he was usually too intimidated to do anything other than observe the Jolly Old Elf from a distance, but I love this one and am trying to decide if I'll add in the others I do have or save them in case I actually manage to pull this thing off and then do it again next year.
 And for Christmas Day:
 Closer up:
 My pages are 8.5 x 8.5. This is a size I love to work with, and I have for many, many years been making my own calendars this size (and also have made one for Ken every year). This spread is actually from my 2012 calendar (I love doing them so much that my own is usually done during the summer of the prior year):
 I use GBC binding -- its a system of punching the little rectangular holes at the inside edge of the pages, then inserting them all in a plastic comb. I buy the combs (which are very inexpensive), and we have the GBC unit that punches and binds at school (although they aren't that expensive -- this one looks pretty deluxe but I'm sure there are less expensive ones out there). It's also possible to take something like this to Staples or a similar service place and have them do a spiral binding for you -- doing one of my calendars this way only costs about $5.
Whew! First I didn't think I'd jump in to this project, then I wasn't sure I'd get my foundation pages made. THEN getting it all on here seemed overwhelming, but I'm proud of myself for doing it. I will do my best to post as I go in December and show how these pages get transformed....


5 comments:
I really like your idea to include photos from past Christmases! Your book looks lovely!
Fabulous pages! I love the Christmas past photos incorporated in......so cool! Too bad she would not let you make copies or give copies to famliy members.....my Mother in law sent me a big box of all my hubbys memorabelia.....originals. But that is another story.....seeing yours makes me think I need to get that box out and do something with it! Lol.....sorry for the long story! Lol......good luck with yours.....I am still finishing up my pages.
it looks beautiful! i think my favourite thing about it might be your 'christmas past' photos. what a great idea. thank you so much for sharing and for stopping in at my blog to tell me that you did!
oh, and, that binding system looks like something worth investigating.
What an accomplishment... I am in awe. So, now everything is ready and you can just add as you go? Very clever.
That's the theory, Natalie -- that you can drop in photos and various bits and bobs, along with journaling, and end up with a record of the holiday....
Post a Comment